⚠️The SDK build process has undergone major changes, now using Python scripts instead of batch scripts. As a result, this tutorial is outdated. The documentation will be updated when time permits, thank you for your patience.
Prerequisite Software
Before getting started, make sure to install the necessary prerequisite software. This includes a compiler appropriate for your target platform, as well as Git for cloning the source code from the repository.
| Operating System | Software |
|---|---|
| macOS | – Git – Xcode 16 or above – Homebrew (optional, for installing CMake and GCC) – CMake 3.10 or above – GCC (if not using Xcode) |
Obtaining Source Code
To build the Kemena3D SDK from source, the first step is to obtain the SDK’s source code. You can either download an official stable release from https://kemena3d.com/downloads, or access the latest development version directly from our GitHub repository at https://github.com/leezhieng/kemena3d.
After cloning the Git repository or extracting the source code from the ZIP archive, you’ll find a directory structure containing folders such as Assets, Demo, Dependencies, Source and Tools. Below is an overview of the purpose of each folder:
| Folder | Description |
|---|---|
| Assets | This folder contains various test assets that you can use to experiment with and evaluate the engine’s features. Please note that each asset may be distributed under a different license, some may not permit use in commercial projects. Be sure to review the README file included in each asset’s folder for specific licensing details. |
| Demo | Here you’ll find the source code for the demo projects designed to showcase Kemena3D in action. You can also download a pre-built version of the demo from our official website if you prefer to try it without building from source. |
| Dependencies | All external libraries required by the engine are managed here. To respect the individual licenses of these libraries, we do not include or fork them directly in the repository. Instead, we provide a shell script that automates downloading and building the necessary dependencies with configurable options for your build environment. |
| Source | This folder contains the complete source code for the Kemena3D SDK, including all engine core classes. The source code for AngelScript is directly bundled in this directory, in accordance with the author’s recommendation and licensing terms, which permit redistribution. |
| Tools | This folder contains a collection of tools to help you prepare and process your assets. For example skybox generator, normal map generator, image converter, and other utilities designed to streamline your asset pipeline and enhance development workflow. |
(Note: This project includes only the SDK. The full editor is maintained as a separate project, which you can access at https://github.com/leezhieng/kemena3d-studio.)
Downloading and Building Dependencies
One of the most challenging aspects of building a C++ project is managing dependencies. To simplify this process, we’ve provided an easy-to-use shell script that automatically downloads and builds all required dependencies based on a few simple configuration options. You can find this script in the Dependencies folder, each supported operating system has its own version of the script.
| Operating System | Shell Script |
|---|---|
| macOS | download_dep_mac.command |
(Note: Refers to the operating system you’re using for development, not the platform you’re targeting. For example, if you’re developing on Windows but building your project for Android, you should still run download_dep_windows.bat.)
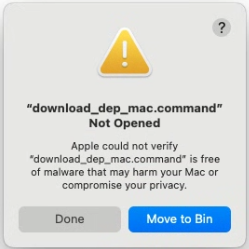
The first time you run the shell script, you might see a security warning stating that it can’t be opened. To proceed, you’ll need to manually allow it from the Privacy & Security settings page.
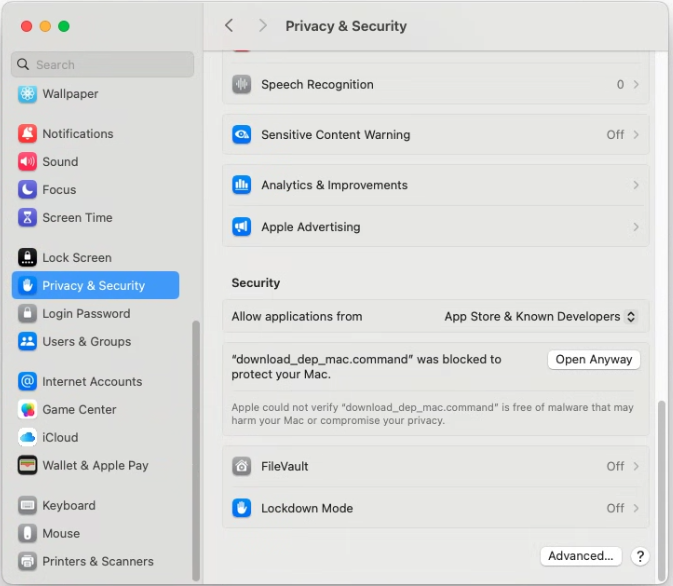
Go to Settings → Privacy & Security → Security and click Open Anyway.
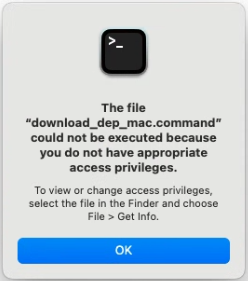
If you still can’t run the shell script and encounter the error message shown below, you’ll need to run a terminal command to grant execution permission. This is a macOS security measure designed to protect your system.
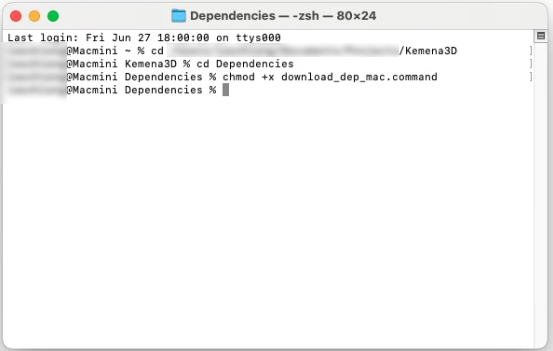
Use the cd command to navigate to the Dependencies folder inside the Kemena3D SDK directory, then run
chmod +x download_dep_mac.commandto grant execute permission. The shell script should now be ready to run.
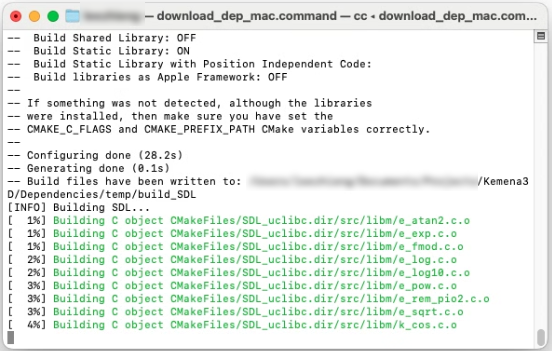
Run the shell script again, this time, you’ll see an interface similar to the screenshot shown below.

Before proceeding with the download and compilation of dependencies, the shell script will prompt you with a few configuration options:
- Select a Compiler
Choose whether to build the dependencies using XCode or GCC. This selection must match the compiler you’re using to build your project. - Static or Dynamic Linking
Decide whether to link the dependencies statically (embed all required functionality directly into the executable) or dynamically (link via DYLIBs at runtime).
We recommend static linking in most cases, as the licenses of the included dependencies typically allow it. However, some use cases, such as integrating with other modules under restrictive licenses (e.g., the Qt Community Edition, which doesn’t permit static linking in certain scenarios), may require dynamic linking instead. - Configure Assimp Settings
Choose how you want to configure Assimp support:- Include all supported 3D model formats (import and export), ideal for use in game editors or tools where broad format support is needed.
- Enable read-only GLTF format support only, which is recommended if you want a smaller executable and only need GLTF support for runtime use.
(Note: You can customize this option in the shell script if you need a different format besides GLTF.)
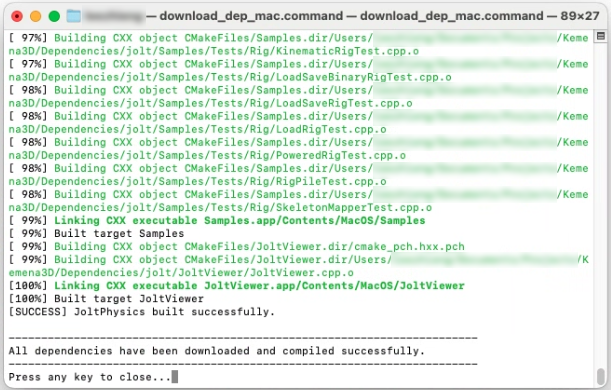
Once you’ve selected your preferred build options, the shell script will begin downloading all required dependencies, either by cloning their repositories or fetching official stable releases, and then proceed to build them based on your chosen configuration.
The entire process typically takes around 15 to 20 minutes, depending on your system and internet speed. Feel free to sit back and relax while the script takes care of the setup for you.
You may encounter some warnings during the compilation process. However, as long as the build completes without errors, these warnings can generally be ignored and won’t affect the functionality of the engine or its dependencies.
If you encounter the following error xcrun: error: unable to find utility "metal", not a developer tool or in PATH and the build fails, you’ll need to open the terminal and run this command:
sudo xcode-select --switch /Applications/Xcode.app/Contents/DeveloperThat should fix the error above.
If you need to change the build configuration or perform a clean build of the dependencies, you can safely delete all subfolders inside the Dependencies directory. Then, simply re-run the shell script to start the setup process from scratch. This approach is recommended to prevent any potential configuration conflicts or build issues.
Building the SDK from Source Code
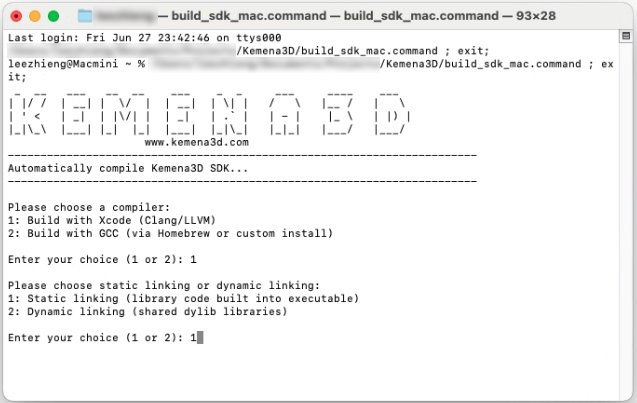
To build the Kemena3D SDK, navigate back to the root directory where you’ll find the CMakeLists.txt file, this is where all the build settings are defined. While you’re free to run CMake manually using this file, we’ve made the process easier by providing a pre-configured shell script. Just like with the dependencies, each supported operating system comes with its own version of the script for convenience.
| Operating System | Shell Script |
|---|---|
| macOS | build_sdk_mac.command |
Just like before, you’ll be prompted to choose two options: the compiler you want to use and whether to build the SDK as a static or dynamic library. Once you’ve made your selections, the build process will begin.
This step is usually much quicker than building the dependencies. In most cases, it only takes a minute or two to complete.
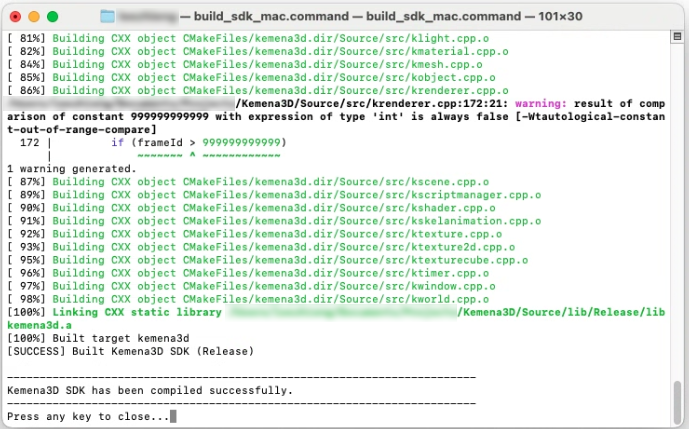
After successfully completing the build process without any errors, the compiled library files will be located in the /Source/lib/Debug and /Source/lib/Release directories.
The types of files generated, such as .lib, .a, or .dll will depend on your chosen linking method (static or dynamic).
- For static builds, you’ll typically see
.lib(on Visual Studio) or.a(on MinGW, Linux, macOS). - For dynamic builds, you’ll see
.dllon Windows and.soor.dylibon Linux/macOS, along with their corresponding import libraries (.libor.a).
Congratulations! You’ve successfully built the Kemena3D SDK! It’s now fully ready to be integrated into your projects. Whether you’re developing a game, visualization tool, or interactive application, you can now start leveraging the full power of the engine in your development workflow.