
Introduction
This guide covers everything you need to set up a development environment on macOS, from installing Xcode to optionally integrating MoltenVK for Vulkan support.
System Requirements
Make sure your Mac meets the following requirements before starting:
| Requirement | Details |
|---|---|
| macOS Version | Xcode 16.4 requires macOS Sequoia 15.3 or later. It is recommended to have at least macOS Sonoma 14.5. |
| Storage Space | At least 30 - 40 GB of free disk space to accommodate Xcode, its simulators, and additional components. |
| Internet | A stable broadband connection (the download is around 10 - 12 GB). |
Installing Xcode from the Mac App Store
The official and easiest way to install Xcode is via the Mac App Store.
- Open the App Store
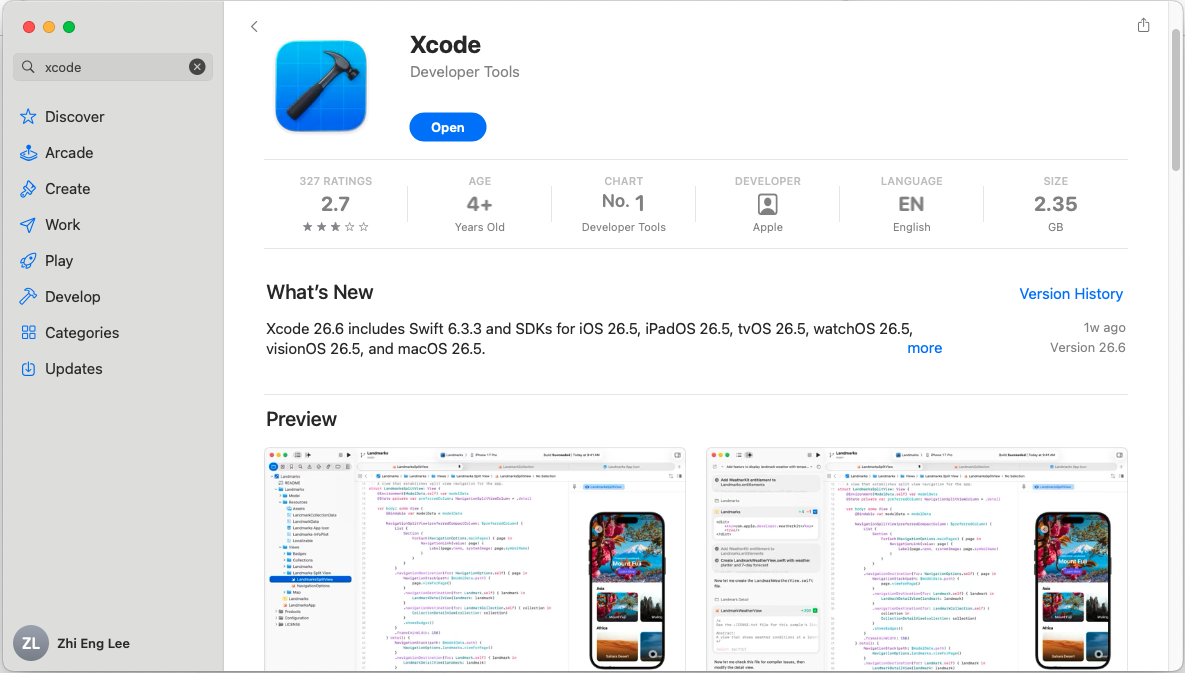
- Search for Xcode
- Download and Install
- Launch Xcode
-
Complete the Initial Setup
- You will be prompted to select platforms (e.g., iOS, macOS, visionOS). Choose the ones you need (you can add more later).
- If asked to "Relaunch Xcode" for final configuration, click the button and wait for it to restart.
- Grant any requested permissions (such as local network access for debugging on physical devices).
Installing the Command Line Tools (Optional)
If you plan to use the Terminal for git, clang, or make, you can install the standalone Command Line Tools package.
Note: If you already installed the full Xcode app, these tools are included. However, you may still use this command to manage or update them separately.
- Open Terminal (
/Applications/Utilities/Terminal.app). - Run the following command:
xcode-select --install - In the pop-up window that appears, click "Install" and agree to the license terms.
- Wait for the download and installation to complete.
Integrating MoltenVK (Optional)
If you want to develop Vulkan applications on macOS, you need MoltenVK. There are two primary ways to get it.
⚠️ Prerequisite: Ensure you have the latest public version of Xcode installed to access the newest Metal SDK features required by the latest MoltenVK builds.
Option A: Using the Vulkan SDK (Recommended for Beginners)
The LunarG Vulkan SDK bundles a pre-built, tested version of MoltenVK specifically for macOS.
- Visit the official Vulkan SDK website.
- Download the macOS installer (
.dmg). - Mount the disk image and run the installer package (
.pkg). - Follow the on-screen instructions. The SDK will install MoltenVK and associated tools to
/usr/local/or a user-specified directory.
Option B: Building MoltenVK from Source (For Advanced Users)
If you need a custom build or a specific platform version (iOS/tvOS/visionOS), you can compile it from source.
- Clone the repository (in Terminal):
- Build using Xcode:
- Open the project file:
open MoltenVKPackaging.xcodeproj - In Xcode, select one of the available schemes:
MoltenVK Package (macOS only)MoltenVK Package (iOS only)MoltenVK Package (tvOS only)MoltenVK Package (visionOS only)(requires Xcode 15+)
- Click Product > Build (
Cmd + B).
- Open the project file:
- Or build via command line (using
xcodebuild):
xcodebuild build -quiet -project MoltenVKPackaging.xcodeproj -scheme "MoltenVK Package (macOS only)" -configuration "Release" - Or use the Makefile:
make macos   # For macOS

# or make ios, make tvos, etc.
You are now ready to integrate Kemena3D with native macOS applications.